
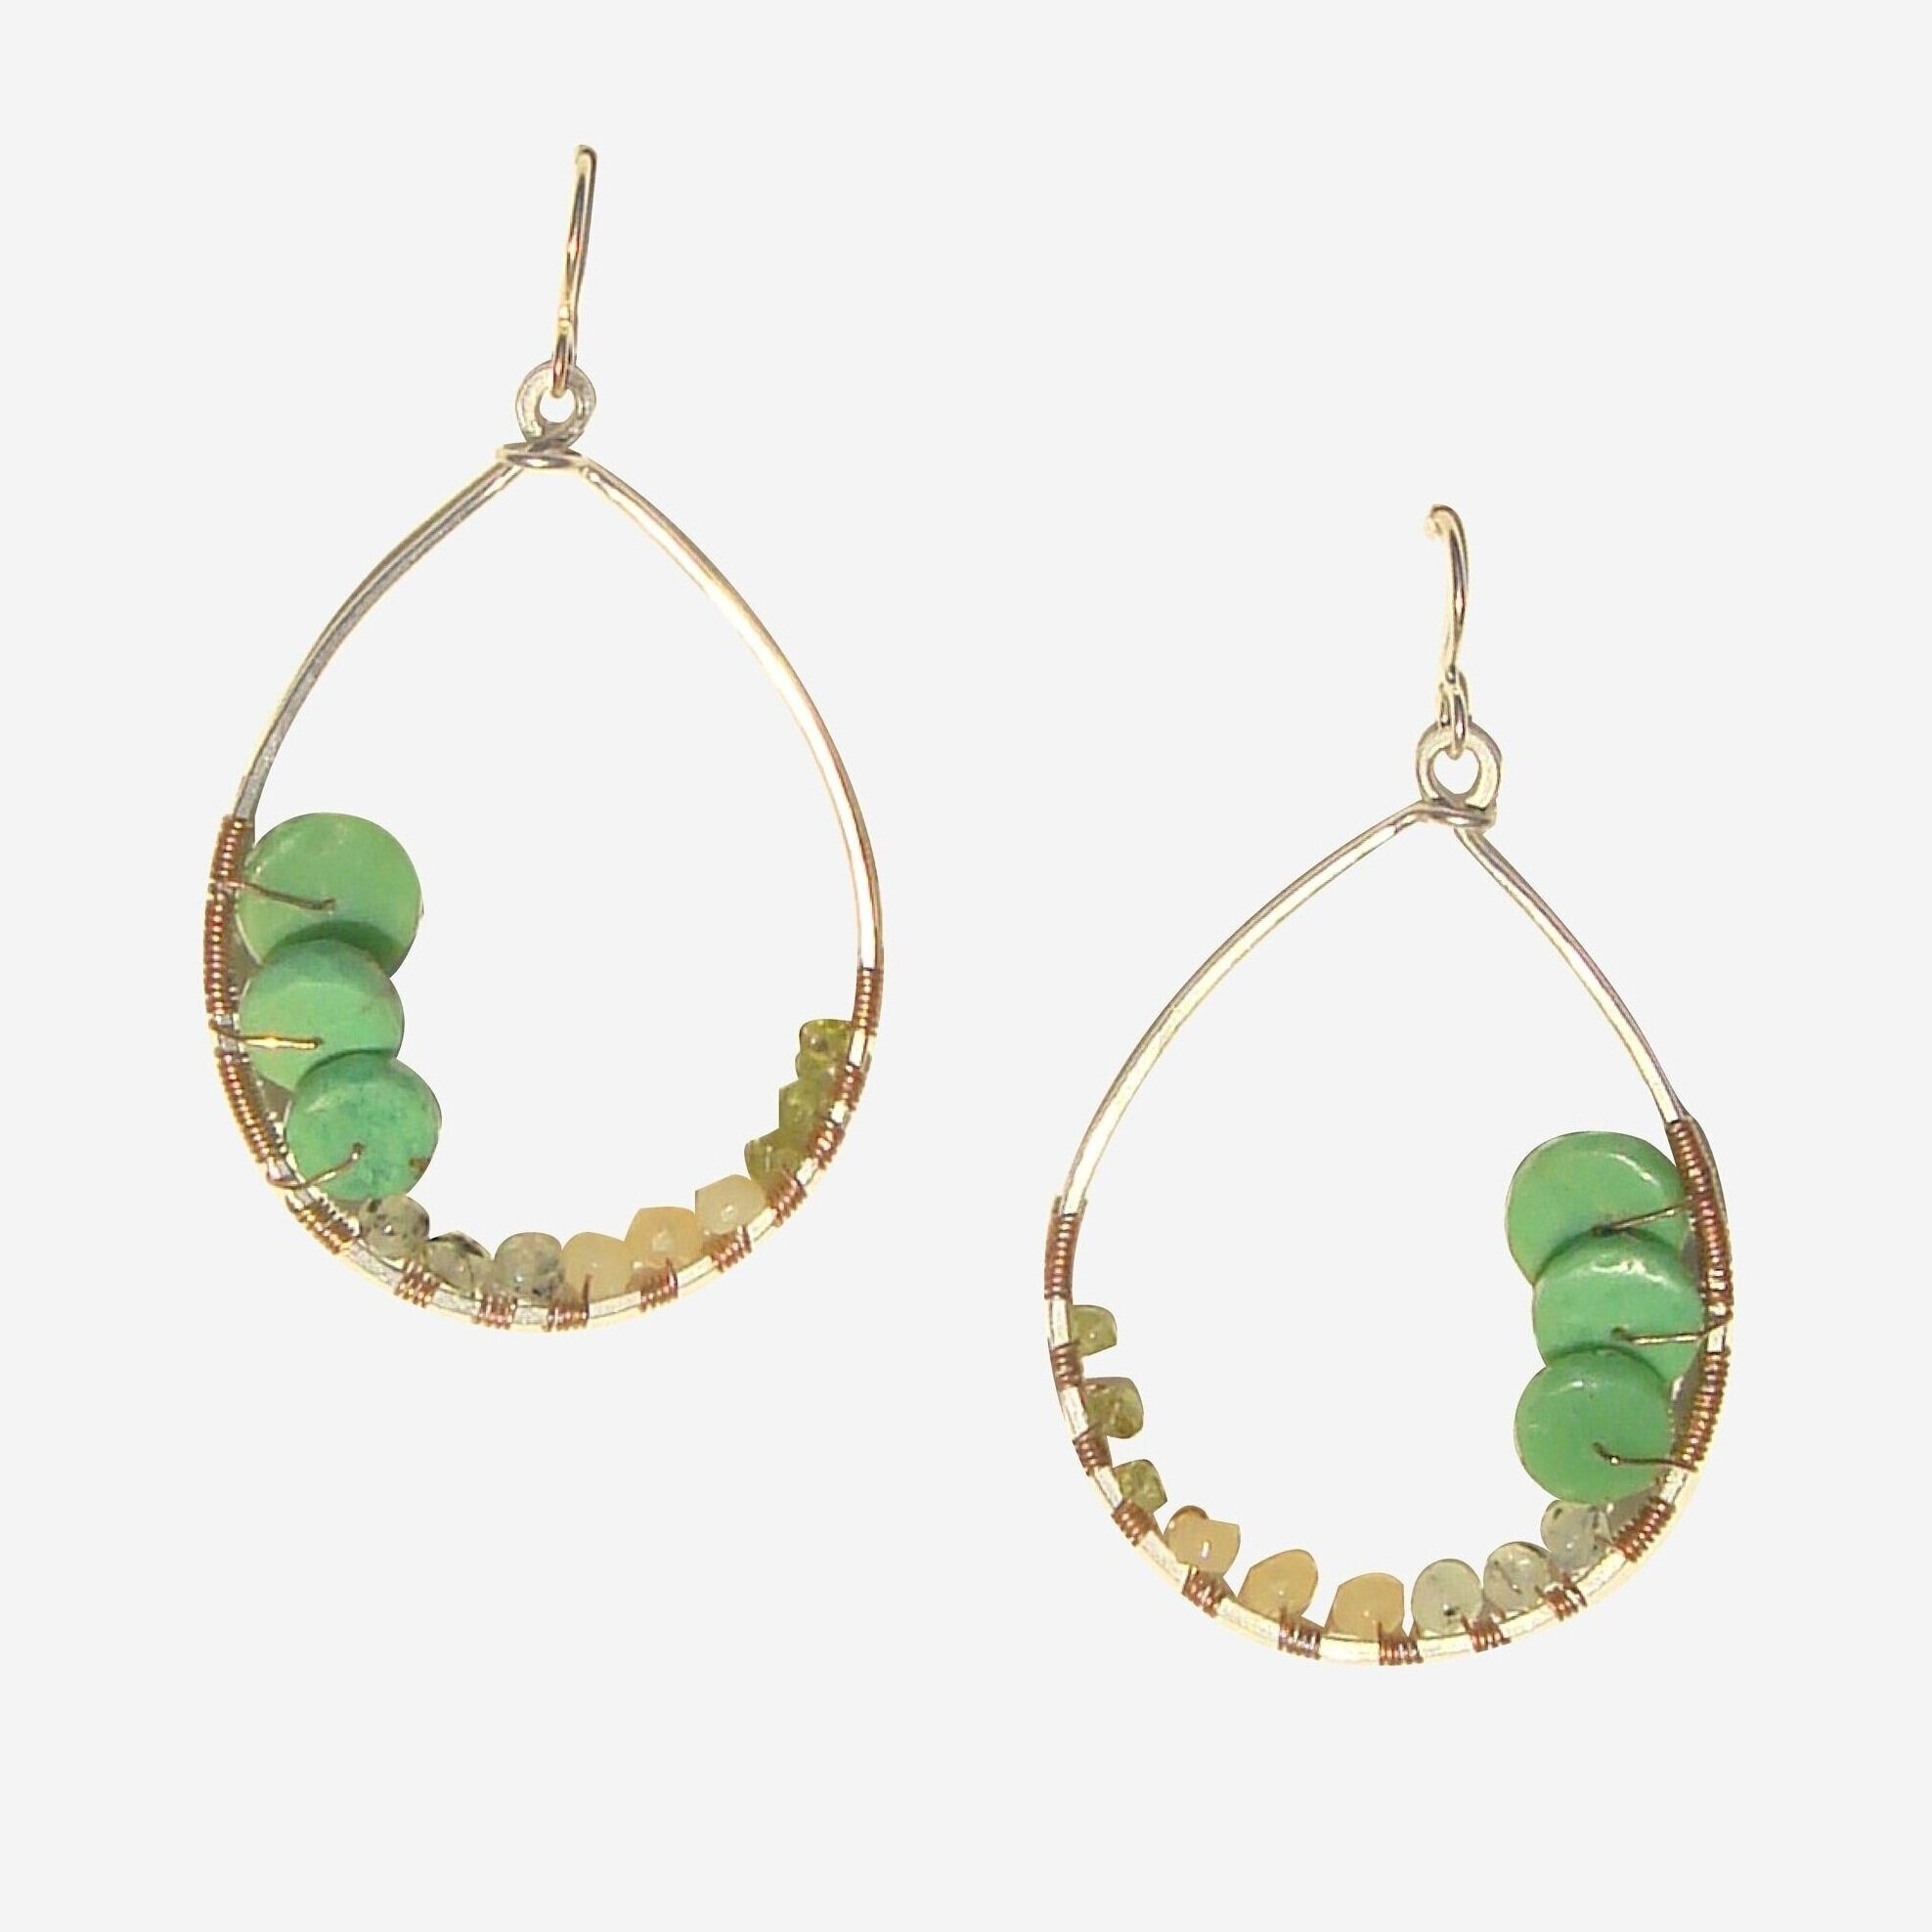
Wire-Wrapped Earring Tutorial
Join me in making a pair of colorful wire-wrapped earrings, as I guide you through the process. This project is easy enough for beginners- all you need is a few basic tools to begin! Gather your supplies & click on the video below to make these earrings along with me!
To make your own version of these eclectic wire-wrapped earrings, you’ll need these basic metalsmithing tools/supplies:
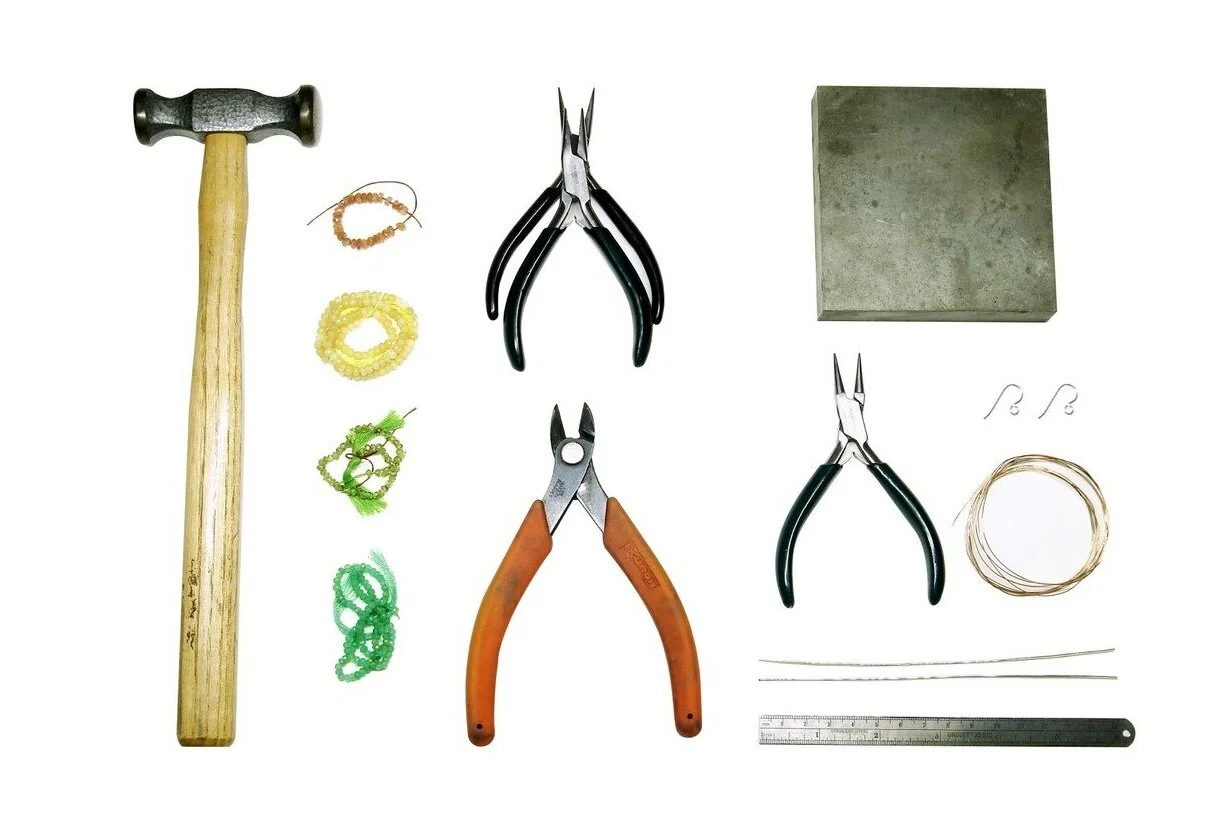
◆Hammer: A planishing or chasing hammer is recommended- like this one.
◆Pliers: You’ll need two of these chain-nose pliers- like these.
◆Round Nose Pliers: You’ll need just one of these- shop here.
◆Wire Cutter: Any will work, however, flush cutters will leave wire with a nice clean cut- such as these
◆Steel Dapping Block: 4 x 4” is my personal fave- here’s an example
◆Ruler: Any will do!
◆18 gauge metal wire: you will need 12” length: such as this
◆24* gauge metal wire: you will need about 5 feet in length: something like this
◆A pair of Earwires: Choose something basic or creative, as you like: such as these, these or these
◆Beads: Approximately 12 per earring- Here’s a great mix!
A few helpful tips to get you started!
Hammer: I recommend using a planishing or chasing hammer for this project. This is a basic metalsmith tool which you’ll like use for years to come, if you pursue this craft, so it’s a great investment. The main thing you’ll want to check is that the face of the hammer is slightly domed. If the hammer is flat, it will leave imprints from the edge of the hammer. If you want to use your household hammer- by all means DO IT!- just be aware that the texture on your hammer will transfer to your projects. Pro tip: embrace the texture, working the hammer consistently around your wire to make it look intentional.
*Wire Size: You’ll want to choose between 24 gauge or 26 gauge wire for the wrapping portion this project. I would recommend using the 24 gauge if you can, as it’s a little bit bigger & is easier to work with for beginners. 26 gauge wire looks equally as beautiful & is great for tiny gemstones with small holes- but this can be hard on the eyes & a teensy bit more trying for the patience!! :-)
Choosing your beads: Get creative! Feel free to mix colors, sizes, textures & shapes. I suggest using sizes somewhere between 3mm to 5mm- up to 10mm for accent beads (The small ones in the photo are about 3mm, large are about 10mm). The most important thing is that you’ll want to make sure the metal wire (24 or 26 gauge) will fit through your bead hole. Some smaller gemstone beads tend to have smaller holes, so it’s a good idea to ask the supplier if these will work for this project!! There are lots of sellers on etsy that sell assorted beads or half-strands for gemstone beads. This is a great option to explore!
Metals: I would recommend working with Sterling Silver, 14K gold-filled, Silver-filled wire, Brass or Bronze (If you have the choice, Dead Soft will be easiest to work with!). These are each affordable options & will be easy to work with. Feel free to get creative & mix metals if you would like to try that as well (such as silver teardrop & earwires with gold wire-wrapped details as in my design). Lastly, I don’t recommend working with plated wire, as the plating may flake off with the hammering.